【Polymer 1.0】クイックツアー
目次
エレメントの登録
自身で作成した新しいカスタムエレメントを登録するには-を含む必要があります。
proto-element.html
<link rel="import" href="bower_components/polymer/polymer.html">

<script>
  // proto-elementという名前の新しいエレメントを登録
  Polymer({
    is: "proto-element",
    // エレメントのプロトタイプにコールバックを追加
    ready: function () {
      this.textContent = "I'm a proto-element. Check out my prototype!"
    }
  });
</script>
index.html
<!DOCTYPE html>
<html>
<head>
  <script src="../../bower_components/webcomponentsjs/webcomponents-lite.min.js"></script>
  <link rel="import" href="proto-element.html">
</head>
<body>
<proto-element></proto-element>
</body>
</html>
実行結果

このサンプルでは初期化の際、テキストを追加するためにライフサイクルコールバックを使用しています。カスタムエレメントの初期化が完了するとreadyというライフサイクルコールバックが呼び出されます。このreadyコールバックはコンストラクタで行うような処理を記述するには最適な場所です。
Local DOMの追加
たいていのエレメントはUIと振る舞いを実装するため、内部にいくつかのDOMを含みます。Polymerではこれを<template>のコンテンツが
dom-element.html
<link rel="import" href="bower_components/polymer/polymer.html">

<dom-module id="dom-element">

  <template>
    <p>I'm a DOM element. This is my local DOM!</p>
  </template>

  <script>
    Polymer({
      is: "dom-element"
    });
  </script>

</dom-module>
index.html
<!DOCTYPE html>
<html>
<head>
  <script src="bower_components/webcomponentsjs/webcomponents-lite.min.js"></script>
  <link rel="import" href="dom-element.html">
</head>
<body>
<dom-element></dom-element>
</body>
</html>
実行結果
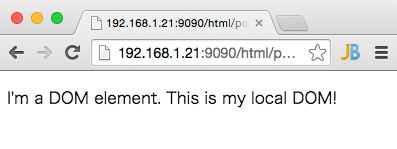
Local DOMを構成する
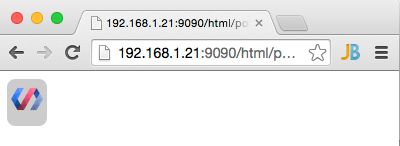
Local DOMによってエレメントの構成を制御することができます。カスタムエレメントを利用する側で、カスタムエレメント内部に定義した子エレメントはまるでLocal DOMに挿入されているかのようにレンダリングされます。
このサンプルでは画像の装飾を行い、この画像はスタイルがあてられた<div>によって囲われます。
picture-frame.html
<link rel="import" href="bower_components/polymer/polymer.html">

<dom-module id="picture-frame">

  <!-- このカスタムエレメントにスコープが限定されたCSS -->
  <style>
    div {
      display: inline-block;
      background-color: #ccc;
      border-radius: 8px;
      padding: 4px;
    }
  </style>

  <template>
    <div>
      <!-- カスタムエレメントの利用側で定義された子エレメントがここにレンダリングされる -->
      <content></content>
    </div>
  </template>

  <script>
    Polymer({
      is: "picture-frame",
    });
  </script>

</dom-module>
index.html
<!DOCTYPE html>
<html>
<head>
  <script src="bower_components/webcomponentsjs/webcomponents-lite.min.js"></script>
  <link rel="import" href="picture-frame.html">
</head>
<body>
<picture-frame>
  <!-- このimgエレメントはカスタムエレメントへ流しこまれます -->
  <img src="../images/p-logo-32.png">
</picture-frame>
</body>
</html>
実行結果
Note:
<dom-module>の内部で定義されたCSSは内部のLocal DOMにスコープされます。つまりCSSのdivルールは<picture-frame>内の<div>タグに適用されることになります。
データバインディング
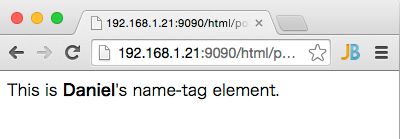
データバインディングはエレメントの変更を伝播する優れた方法です。プロパティのバインドには"double-mastache"シンタックス{{}}を使用します。実行時{{}}はこの括弧内に囲まれた参照プロパティの値に置き換えられます。
name-tag.html
<link rel="import" href="bower_components/polymer/polymer.html">

<dom-module id="name-tag">

   <template>
    <!-- ownerプロパティとバインド -->
    This is <b>{{owner}}</b>'s name-tag element.
   </template>

   <script>
  Polymer({
    is: "name-tag",
    ready: function () {
      // このエレメントのownerプロパティの設定
      this.owner = "Daniel";
    }
  });
</script>

</dom-module>
index.html
<!DOCTYPE html>
<html>
<head>
  <script src="bower_components/webcomponentsjs/webcomponents-lite.min.js"></script>
  <link rel="import" href="name-tag.html">
</head>
<body>
<name-tag></name-tag>
</body>
</html>
実行結果
宣言型プロパティ(Declared properties)
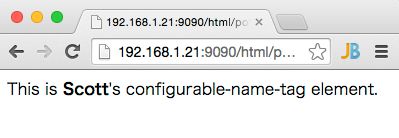
カスタムエレメントのパブリックAPIとしてプロパティは重要な機能です。Polymerの宣言型プロパティは一般的によく使われる機能を提供してくれます。デフォルト値の設定、マークアップ(カスタムエレメント利用者)によるプロパティ設定、プロパティ変更の監視、などです。
以下のサンプルではownerという宣言型プロパティを追加し、デフォルト値の設定と、
configurable-name-tag.html
<link rel="import" href="bower_components/polymer/polymer.html">

<dom-module id="configurable-name-tag">

  <template>
    <!-- ownerプロパティとバインド -->
    This is <b>{{owner}}</b>'s configurable-name-tag element.
  </template>

  <script>
    Polymer({
      is: "configurable-name-tag",
      properties: {
        // ownerプロパティの宣言
        owner: {
          type: String,
          value: "Daniel"
        }
      }
    });
  </script>

</dom-module>
index.html
<!DOCTYPE html>
<html>
<head>
  <script src="bower_components/webcomponentsjs/webcomponents-lite.min.js"></script>
  <link rel="import" href="configurable-name-tag.html">
</head>
<body>
<!-- マークアップで属性を通してプロパティを設定 -->
<configurable-name-tag owner="Scott"></configurable-name-tag>
</body>
</html>
実行結果
プロパティのバインド
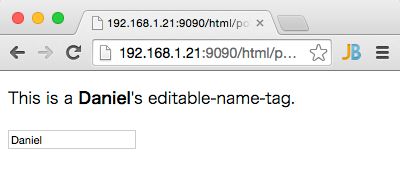
テキストインプットを追加して、プロパティとテキストインプットのバインドを行います(property-name="{{binding}}")。Polymerは
このサンプルではtwo-wayバインディングを使用します。カスタムインプットエレメント(iron-input)の値と、自身のカスタムエレメントのownerプロパティをバインドすることにより、ユーザーが入力を行うとカスタムエレメントが更新されます。
editable-name-tag.html
<link rel="import" href="bower_components/polymer/polymer.html">
<!-- iron-inputカスタムエレメントをインポート -->
<link rel="import" href="bower_components/iron-input/iron-input.html">

<dom-module id="editable-name-tag">

  <template>
    <p>
      This is a <strong>{{owner}}</strong>'s editable-name-tag.
    </p>
    <!-- iron-inputはbind-valueというtwo-wayバインディング可能な属性を公開している -->
    <input is="iron-input" bind-value="{{owner}}"
           placeholder="Your name here...">
  </template>

  <script>
    Polymer({
      is: "editable-name-tag",
      properties: {
        owner: {
          type: String,
          value: "Daniel"
        }
      }
    });
  </script>

</dom-module>
index.html
<!DOCTYPE html>
<html>
<head>
  <script src="bower_components/webcomponentsjs/webcomponents-lite.min.js"></script>
  <link rel="import" href="editable-name-tag.html">
</head>
<body>
<editable-name-tag></editable-name-tag>
</body>
</html>
実行結果
Note: ここでの
is="iron-input"属性は<input>が型拡張(type-extension)カスタムエレメント であることを示しています。ここでの<input>エレメントはiron-inputであり、ネイティブな<input>エレメントを継承します。